Euro Domain

Tuesday, April 28, 2015

Enable Power Query on Microsoft Excel 2013


REMARK: Supported on following Office versions: 
. Microsoft Office 2010 Professional Plus with Software Assurance
. Microsoft Office 2013 Professional Plus, Office 365 ProPlus or Excel 2013 Standalone

1. Download Power Query 32 bit/ 64 bit.

2. Execute PowerQuery_2.21.3974.242 (64-bit) [en-us].msi.

3. Click Next.

4. Check 'I accept the terms in the Licence Agreement'. Click Next.

5. Click 'Change...' to change Installation Folder or click Next to use the default.

6. Click Install.

7. Click Finish.

8. Run Excel 2013. 'Power Query' menu had been added to Menu bar.

URL: http://support.office.microsoft.com/client/Introduction-to-Microsoft-Power-Query-for-Excel-6E92E2F4-2079-4E1F-BAD5-89F6269CD605?NS=EXCEL&Version=15

Monday, April 27, 2015

Delete/ Merge Duplicate Google Contacts


1. Open Contacts Preview using Chrome browser

2. Clik Find duplicates

3. All duplicate contacts will shown on right hand side.

4. Check individual duplicate contacts. Click Merge icon at the top right of the page.


   OR

5. To merge all the duplicates, click the Merge all icon at the top right of the page.

URL: https://support.google.com/mail/answer/165334?hl=en

Transfer Samsung Note 4 Contacts into Google Account


1. On Samsung Note 4, click Contacts.

2. Tap on overflow menu (denoted by three vertical dots located on top right hand side)

3. Tap Settings > Contacts > Import/export contacts > Export to device storage

4. Confirm export: OK

5. Tap Settings > Contacts > Import/export contacts > Import from device storage

6. Save contact to: Google

7. Importing in progress

8. Tap OK

URL: http://www.techrepublic.com/article/pro-tip-migrate-all-of-your-android-contacts-to-google/

Upgrade iPhone 3GS to iOS 6.1.6


WARNING: Before perform the update, always perform phone backup! The author will NOT be held responsibility under any circumstances.

PRE-CHECK LIST

1. Make sure the phone battery is fully charged or connect to direct power source (recommended).

2. 'Wi-Fi' is connected to download the iOS 6 package.

3. Full iPhone 3GS backup using iTunesFollow this guide to install iTunes; http://emanduel.blogspot.com/2012/07/install-itunes-on-windows-xp-pro-sp3.html.

4. Once backup completed, disconnect the phone.

UPDATE!

1. On iPhone 3GS, To view installed version:
   Settings > General > About. Look for Version: 5.1.1

2. Settings > General > Software Update

3. Install Now > Agree

4. The device will reboot and upgrade on progress.

5. Once finish, it'll reboot. Swipe to continue.

6. Update Completed: Continue

7. Location Services: Disable Location Services. Next > OK

8. Apple ID Sign ID: . Next > Agree > Agree

9. Messaging: Check only 'Your Phone Number'. Next

10. Thank you: Start Using iPhone

Sunday, April 26, 2015

Transfer iPhone 3GS to Samsung GALAXY Note 4 Using Samsung SmartSwitch


1. Connect iPhone 3GS to PC USB port.

2. Open iTunes.

3. File > Devices > Backup

4. Once backup completed, disconnect iPhone 3GS. Quit iTunes.

5. Download Samsung SmartSwitch for Windows or MAC OS.

6. Install Samsung SmartSwitch and reboot the PC.

7. Connect Samsung GALAXY Note 4 to PC USB port

8. Run SmartSwitch


9. Click Restore > Change data to restore


10. Under 'Select backup data to restore', click 'Non-Samsung device data'

11. Check 'Select all (7 selected)' > OK


12. Click 'Restore now'

13. Wait till the restoration completed.


14. Click Confirm.

15. Disconnect Samsung GALAXY Note 4. Quit SmartSwitch.

Friday, April 24, 2015

GALAXY Note 4: First Time Setup


UPDATED: 26.07.2020

 1. Select language: English (United Kingdom)

2. Click Accessibility button for visually impaired or hard of hearing user to change to accessibility settings (optional)

3. Click START >.

4. Wi-Fi networks: 
     Select the intended SSID: {SSID} 
     Enter password: {wifi password} 
     CONNECT 
     NEXT >

5. EULA & Diagnostic Data: 
    Check 'I understand and agree to the terms and conditions above'.
    Click 'No thanks'
    Click NEXT >

6. Have another device? > No, thanks > NEXT >
   
7. Google Sign in
    Email or phone: {emailid@gmail.com}
    Next
    Enter your password: {password}
    Next

8. Google Add phone number? > Skip

9. Google Welcome > I agree

10. Google services:
      Automatically back up device data: Off
      Use Google's location service to help apps: Off
      Help improve your Android experience: Off
      NEXT >

11. Set up payment info: > No, thanks > CONTINUE >

12. Date & time: 
      Kuala Lumpur GMT+08:00
      Date: dd/mm/yyyy
      Time: hh:mm
      NEXT >

13. Set up email > Not now

14. Samsung account > CREATE WITH GOOGLE ID.
      Enter email ID: {emailid@gmail.com}
      Enter password: {password}
      Confirm password: {re-enter password}
      Birthday: dd Mmm yyyy > OK
      First name: {First name}
      Last name: {Last name}
      NEXT >

15. Samsung account:
      Terms and Conditions and Special terms: Check
      Samsung Privacy Policy: Check
      AGREE >

16. Welcome to Samsung account! > NEXT >

17. Thank you!:
      Device name: {device name}
      Enable easy mode: Uncheck
      FINISH >

Thursday, April 23, 2015

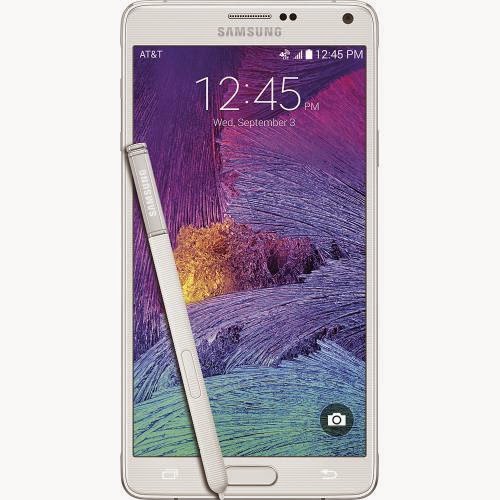
Samsung GALAXY Note 4 32GB Frost White SM-N910C


In The Box
. Samsung GALAXY Note 4 32GB Frost White
. Battery EB-BN910BBE 3220 mAh
. White EO-EG900BW Headset
. EO-EG900BW Headset cap
. Micro USB cable ECB-DU4EWE
. Adaptive Fast Charging EP-TA20UWE Adapter
. S Pen
. Extra pins for S Pen
. Documentation

COOL’s
. Premium Screen (Quad HD Super AMOLED Display)
. Bright and clear images with Advanced Camera CMOS 16.0 MP
. Fast charging; 0 - 50% around 30 minutes
. Enlarge storage - up to 128GB MicroSD card
. Larger screen - 5.7"
. Enhanced S Pen

SUCX’s
. Expensive
. Overload due to bloatware
. Essentially same design with Note 3

URL: http://www.samsung.com/my/consumer/mobile-devices/smartphones/galaxy-note/SM-N910CZIEXTE